
Introduction
When it comes to cooking techniques, blanching stands out as a versatile and essential method. Whether you’re a professional chef or a home cook, understanding how to blanch effectively can elevate your culinary skills to new heights. In this article, we’ll dive into the world of blanching, exploring what it is, why it’s used, and how to do it properly. Join us on this journey to unlock the secrets of preserving color, flavor, and nutrition in your dishes through the art of blanching.
Table of Contents
- What is Blanching?
- Why is Blanching Important?
- The Blanching Process Step by Step
- Step 1: Boiling Water Preparation
- Step 2: Preparing the Produce
- Step 3: The Blanching Procedure
- Step 4: Cooling and Draining
- Blanching and Its Impact on Color Preservation
- Maintaining Flavor and Texture Through Blanching
- Blanching to Enhance Nutritional Value
- Blanching Times for Different Foods
- Vegetables
- Fruits
- Nuts and Seeds
- Meat and Seafood
- Beyond Blanching: Creative Applications
- Tips for Successful Blanching
- Common Mistakes to Avoid
- Conclusion
What is Blanching?
Blanching is a cooking technique that involves briefly immersing food items in boiling water and then quickly transferring them to ice water to halt the cooking process. This method is particularly useful for vegetables, fruits, nuts, seeds, and even certain meats and seafood. The primary goal of blanching is to partially cook the food, preserving its vibrant color, natural flavors, and nutritional content.
Why is Blanching Important?
Blanching serves several essential purposes in the culinary world. Firstly, it helps to maintain the appealing colors of fruits and vegetables by deactivating enzymes that can lead to color loss and dullness. Secondly, blanching contributes to enhancing and locking in the flavors of the ingredients. Lastly, blanching plays a crucial role in food safety, as it eliminates surface contaminants and reduces the risk of spoilage.
The Blanching Process Step by Step
Step 1: Boiling Water Preparation
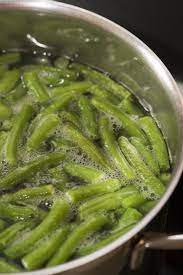
The blanching process begins with bringing a pot of water to a rolling boil. It’s essential to use a sufficient amount of water to ensure that the temperature doesn’t drop significantly when adding the food.
Step 2: Preparing the Produce
Wash and clean the food items you intend to blanch. Trim any excess parts, such as stems or peels. This step ensures that the final result is visually appealing and free from unwanted elements.
Step 3: The Blanching Procedure
Gently lower the prepared food into the boiling water. The food should be fully submerged. The blanching time varies depending on the type of food, so refer to specific guidelines. The goal is to partially cook the item, meaning it should be tender but not fully soft.
Step 4: Cooling and Draining
As soon as the blanching time is up, use a slotted spoon to transfer the food into a bowl of ice water. This rapid cooling process, known as “shocking,” halts the cooking and helps maintain the vibrant color. Once cooled, drain the food and pat it dry.
Blanching and Its Impact on Color Preservation
Blanching works wonders in preserving the natural colors of fruits and vegetables. The enzymes responsible for color degradation are inactivated, resulting in bright and visually appealing ingredients that enhance the overall presentation of dishes.
Maintaining Flavor and Texture Through Blanching
Unlike prolonged cooking methods, blanching cooks the outer layers of the food, leaving the interior with a delightful crunch or tenderness. This dual texture adds depth to dishes, making them more enjoyable to eat.
Blanching to Enhance Nutritional Value
Contrary to the misconception that blanching diminishes nutritional value, this technique can actually help retain essential vitamins and minerals. By minimizing cooking time, blanching locks in nutrients that might otherwise be lost through extended exposure to heat.
Blanching Times for Different Foods
Vegetables, Fruits, Nuts, and Seeds
Different foods have varying blanching times. For instance, delicate greens might only need 1-2 minutes, while heartier vegetables could require 3-4 minutes. Fruits, nuts, and seeds typically have shorter blanching times to maintain their textures and flavors.
Meat and Seafood
Blanching seafood and meat is useful for removing impurities, enhancing flavors, and partially cooking before incorporating them into dishes like stews or stir-fries.
Beyond Blanching: Creative Applications
Blanching isn’t just limited to preserving color and texture. Creative chefs use it as a preparation technique for freezing, canning, or as a preliminary step before grilling or sautéing.
Tips for Successful Blanching
- Use a timer to ensure accurate blanching times.
- Work in batches to avoid overcrowding the pot.
- Prepare an ice bath in advance to cool foods quickly.
- Choose fresh, high-quality produce for the best results.
Common Mistakes to Avoid
- Overcooking: Watch the clock to prevent foods from becoming overly soft.
- Skipping the ice bath: Neglecting rapid cooling can undo the blanching’s benefits.
- Not adjusting blanching times: Different altitudes can affect cooking times.
Conclusion
Blanching is a culinary technique that exemplifies the art of preserving color, flavor, and nutrition in various foods. By mastering this simple yet impactful method, you can elevate your cooking skills and create visually stunning, delicious, and nutritious dishes.